+86
17853698681
+86
17853698681
 Current
location:
Current
location:The dust particle counter is a precision instrument used to detect the number
and size distribution of dust particles in the air. It is widely applied in
industries such as medicine, electronics, food processing, and aerospace to
ensure that the cleanliness of production or research environments meets
specific standards. This article will detail the basic operating steps of the
dust particle counter to assist users in completing tasks accurately and
efficiently.
Basic operation steps of a dust particle counter:
1. Power on
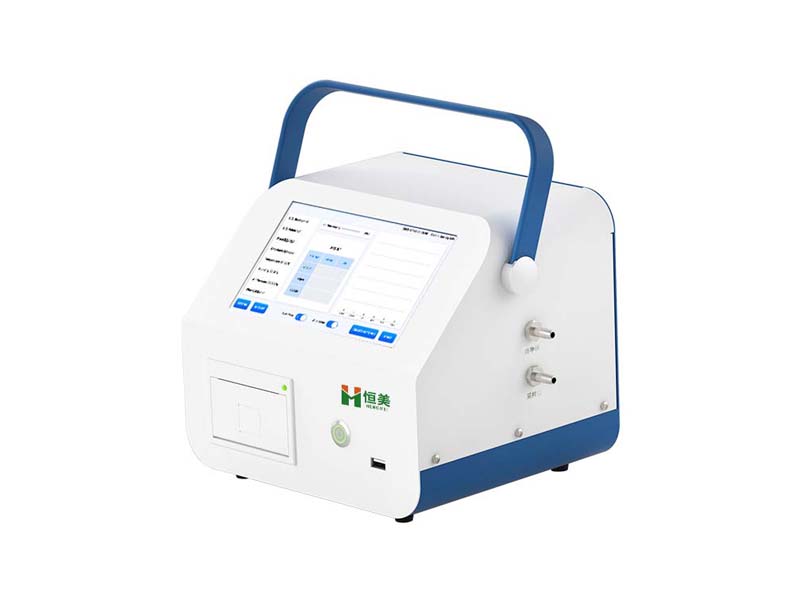
After pressing the machine's power switch, the power indicator light will illuminate. Once the system is activated, the particle counting app will automatically launch. After the self-check is completed, the main measurement interface will appear.
2. System settings
Single sampling time: It refers to the duration of a single measurement, measured in seconds. Typically, a single sampling time is set to 60 seconds.
Startup delay: The time it takes for airflow to pass through the pipeline, which is the interval between the air pump being turned on and the start of counting, measured in seconds.
Single acquisition interval: The time interval between each acquisition, measured in seconds.
Unit setting: The machine supports cubic meters (m³) and cubic feet (ft³) by default. If other units are required, please contact our company.
Language setting: This machine supports bilingual display in both Chinese and English.
Time setting: You can change the local time.
Alarm setting: The alarm setting is used for cleanliness level alarms.
3. Complete the first measurement
① Ordinary measurement
The instrument supports ordinary single-point measurement. After clicking the "Collection Information Settings" button, select "None" for the calculation standard to proceed with ordinary measurement. For ordinary measurement, you can set the number of measurements, measure the particle count and concentration at the current point, and no confidence report will be generated.
② Standard measurement
Standard measurement is a process of calculating the corresponding standard through statistics after multiple measurements at multiple points indoors. The testing requirements for airborne particle counters in a clean room are as follows: the number of sampling points should be no less than 2, the total number of sampling times should be no less than 5, and the 95% upper confidence limit (UCL) of the clean room should be calculated.
The airflow state can be selected as static or dynamic during measurement. During static measurement, the number of indoor testers should not exceed 2.
For the measurement location, you can enter the identification information of the current measurement clean room, which will be displayed in the report. The number of single-point measurements and the number of measurement points are used for UCL calculation. These two parameters will directly participate in the cleanliness calculation and need to be filled in according to relevant standards.
4. Query report data
Clicking the (History) button on the main interface will take you to the data list interface, which records all measurement data that has been enabled for data saving. Once you enter this list, you can perform operations such as deleting and exporting data. To export data, first insert a USB flash drive into the USB port on the front panel of the machine, and then click the (Export Data) button to export the data to the USB flash drive.
Clicking on a piece of data from the data list will take you to the data report page, which includes the cleanliness report and the raw data of the counts.
Proper operation of a dust particle counter not only effectively monitors environmental cleanliness but also ensures accurate and reliable data, providing strong support for production and scientific research activities in related industries. By following the above-mentioned operational steps and precautions, users can easily master the use of the dust particle counter and ensure the accuracy of each test.
Article address:https://www.cleanlinesstesting.com/news2/51.html